How to Print Logo Designs on Merchandise

Source: Rustam Suleymanov, Baku Short Film Festival [concept], Behance, https://www.behance.net/gallery/164693215/Baku-Short-Film-Festival-concept
Printing logo designs on merchandise is a vital strategy for enhancing brand visibility and engagement. Whether you’re creating custom apparel, promotional gifts, or unique corporate merchandise, the quality of your logo print can significantly influence your brand's perception. This guide provides essential tips and best practices for printing logo designs on various types of merchandise effectively and efficiently. From choosing the right printing techniques and materials to ensuring color accuracy and optimal placement, we'll cover the key aspects you need to consider. We'll also discuss the importance of preparing high-resolution logo files to maintain design integrity during the printing process.
By following these guidelines, you can ensure that your logo looks professional, maintains consistency across different items, and withstands the wear and tear of everyday use. This will not only reinforce your brand identity but also leave a lasting impression on your audience. Let’s dive into how to achieve the best results when printing your logo designs on merchandise, ensuring every piece reflects your brand's quality and values.
Select the Right Printing Technique
When planning to print logo designs on merchandise, selecting the appropriate printing technique is crucial for achieving optimal results. The three most common methods are screen printing, digital printing, and embroidery. Screen printing offers durability and cost-effectiveness for large orders, making it ideal for simpler designs on t-shirts and hoodies. Digital printing, on the other hand, allows for vibrant full-color prints with detailed gradients, perfect for small batches or items requiring high-resolution graphics like tote bags and promotional banners.
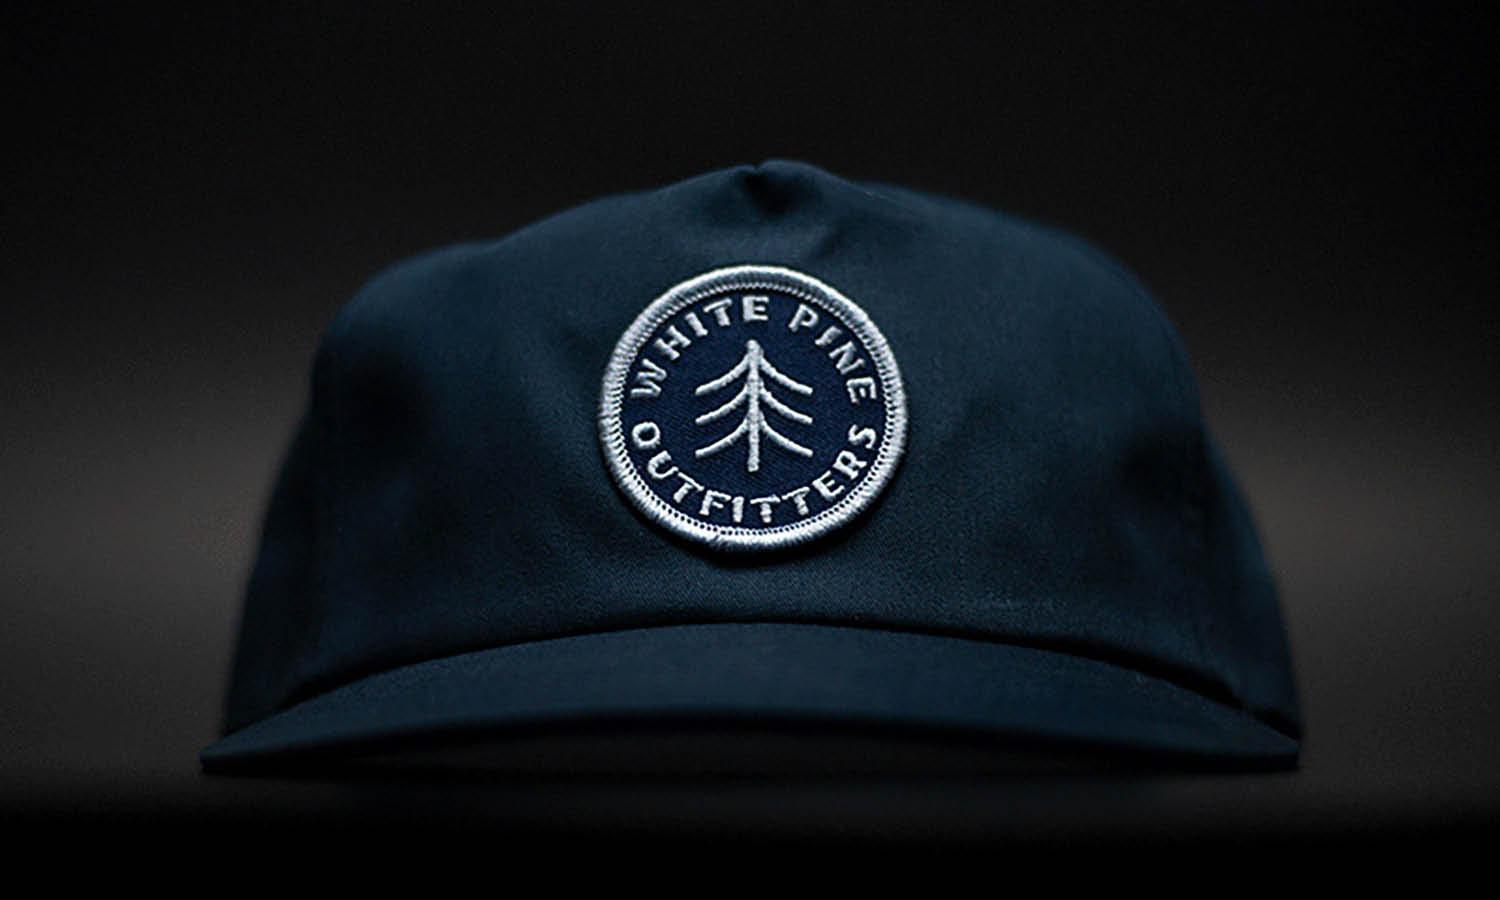
Embroidery adds a premium touch with its textured, three-dimensional appearance, suitable for hats, polos, and other corporate apparel. Each technique has distinct advantages depending on the project's scale, budget, and desired aesthetic. Therefore, understanding these options helps ensure that your logo is reproduced faithfully and effectively on your chosen merchandise.
Understand Material Compatibility
Material compatibility is key to successful logo printing on merchandise. Different fabrics and materials react differently to various printing techniques, affecting both the appearance and durability of the final product. For instance, cotton is ideal for screen printing due to its absorbency, while polyester works well with sublimation printing, which dyes the fabric for a vibrant and long-lasting finish. Non-textile merchandise, such as mugs and pens, require techniques like pad printing or laser engraving to achieve precise and durable logos.
Before selecting a printing method, consider factors such as the material's texture, heat sensitivity, and absorbency. Testing the print on a sample piece can also prevent costly errors and ensure that the logo maintains its integrity and visual impact. Understanding these material-specific considerations will guide you in choosing the most effective printing technique for any type of merchandise.
Prepare High-Resolution Logo Files
Preparing high-resolution logo files is essential for ensuring that your designs look professional when printed on merchandise. Start by creating your logo in a vector format using software like Adobe Illustrator. This format allows you to scale your design to any size without losing quality, which is crucial for printing across different types of merchandise, from small pens to large banners. Ensure that your logo files are saved in formats such as AI, EPS, or PDF, which preserve the vector qualities. If raster images are necessary, such as for complex gradients or photographs within a logo, use high-resolution settings—at least 300 dpi (dots per inch).
This resolution ensures that the details of your logo are sharp and clear, avoiding any blurriness or pixelation. Additionally, maintain a clean and organized layer structure in your files, with outlined fonts and embedded images, to prevent any issues during the printing process. By ensuring that your logo files are of high quality and correctly formatted, you can achieve consistent and striking results on all your printed merchandise.

Source: Roman Shtein, Intervals' 22 Visual Communication, Behance, https://www.behance.net/gallery/169400227/Intervals-22-Visual-Communication
Test Color Accuracy
Testing color accuracy is a crucial step in the process of printing logo designs on merchandise. Colors can appear differently on a computer screen compared to their printed versions, which can affect brand consistency and recognition. To ensure accuracy, use Pantone matching system (PMS) colors for your logo, which printers can replicate exactly. Additionally, conduct a proofing session with your printer to see how the colors render on the actual merchandise materials. This is especially important for materials that may not absorb ink or dye in the same way, such as different types of fabrics or plastics.
Consider the lighting conditions under which the merchandise will be viewed, as colors can shift in appearance under different lights. By testing the color accuracy before full production, you can adjust the color specifications to ensure that they meet your expectations and maintain the integrity of your brand identity on all merchandise.
Consider the Print Size and Placement
Choosing the right print size and placement of your logo on merchandise is crucial for maximizing brand impact. The size of the logo should be appropriate for the type of merchandise and its intended use. For example, a logo on a t-shirt might be larger and placed centrally, whereas on a cap, it might be smaller and off to the side. It's important to maintain a balance between visibility and aesthetics; a logo too large might overwhelm the item, while one too small could go unnoticed. Placement is also key to ensuring the logo engages the viewer. Common placements vary by item: chest or pocket placement for shirts, frontal placement for hats, or side placement for bags.
Each placement option should consider the user's perspective and the nature of the merchandise. Mock-ups and prototypes can be helpful to visualize how the final product will look. Testing different sizes and placements with your target audience can provide valuable feedback to optimize the branding of your merchandise.
Use Durable Inks and Materials
To ensure that your printed logo designs on merchandise remain vibrant and intact over time, selecting durable inks and materials is essential. Use inks that are formulated to resist fading, cracking, or peeling, which can occur with regular wear and washing. Screen printing inks are known for their durability and color depth, making them suitable for a variety of fabrics and products. For items that will be subjected to heavy use or outdoor exposure, consider using UV-resistant inks to prevent color degradation from sunlight.
Similarly, the materials on which you print should be high quality to support the longevity of the print. For textiles, choose fabrics that can withstand the heat and pressure of printing processes without deteriorating. For non-textile merchandise, like mugs or pens, opt for materials that bond well with the inks used to avoid chipping or fading. Investing in quality inks and materials not only extends the life of the merchandise but also enhances your brand's reputation for quality.
Account for Print Size Variations
When printing logo designs on merchandise, accounting for print size variations across different items is crucial for maintaining brand consistency. A logo that looks perfect on a large canvas may not translate well to smaller, more intricate merchandise such as pens or keychains. To manage this, create scalable versions of your logo. This might include simplified versions that maintain the essence of your design but reduce detail that could become lost or muddled on smaller items. Additionally, consider the proportion of the logo in relation to the item it's being printed on; a logo should be neither overpowering nor too subtle.
Utilizing templates or standardized sizing charts can help streamline this process, ensuring each item receives the appropriately sized logo. It's also beneficial to prototype each variation to observe how the size impacts the overall look and feel of the merchandise. This proactive approach allows you to adjust the design as necessary before committing to full-scale production, thereby safeguarding your brand’s visual identity across all forms of merchandise.

Source: Liteshop2, Koffein, Behance, https://www.behance.net/gallery/135432551/Koffein
Understand Washing and Maintenance Effects
Understanding the effects of washing and maintenance on printed merchandise is key to ensuring the longevity and appearance of your logo designs. Different printing methods and inks respond uniquely to washing conditions, which can affect the color and integrity of the print. For instance, digitally printed items should be washed inside out, in cold water, and without harsh detergents to prevent fading and cracking. Similarly, screen-printed merchandise requires gentle washing cycles to preserve the ink quality over time. It's important to provide clear care instructions with your merchandise to inform customers about proper maintenance practices that will prolong the life of the product.
Additionally, selecting high-quality, durable inks and materials during the production process can significantly enhance the resilience of the prints against routine wear and tear. By prioritizing washing and maintenance considerations, you can ensure that your logo maintains its visual impact and continues to promote your brand effectively with each use.
Check for Print Layering and Texture
When printing logo designs on merchandise, it's essential to consider the layering and texture that each print method imparts on the material. Screen printing, for instance, adds layers of ink that sit atop the fabric, creating a noticeable texture that can be felt with the hand. This method is ideal for vibrant, bold designs on textiles like t-shirts and hoodies. On the other hand, digital printing integrates the ink directly into the fabric, resulting in a smoother texture that works well for detailed, multi-colored images. The choice of printing technique should align with the desired final texture of your product, as texture can enhance the visual appeal and perceived quality of the merchandise.
The number of layers involved in the printing process should be carefully managed to avoid issues such as ink bleeding or opacity problems, which can detract from the sharpness and clarity of the design. Testing different methods on your chosen material before final production will help ensure that the layering and texture meet your standards, thereby enhancing the overall effectiveness of your branded merchandise.
Ensure Print Alignment and Spacing
Ensuring correct print alignment and spacing is crucial for the professional presentation of your logo designs on merchandise. Misalignment or inconsistent spacing can significantly detract from the visual impact and perceived quality of the product. To avoid these issues, use precise measurements and templates that cater to the specific dimensions of each type of merchandise. Whether printing on a shirt, hat, or backpack, each item should be carefully measured to position the logo optimally. This includes considering elements like the seam, tags, and any functional components like pockets or zippers that could interfere with the design.
Digital mock-ups and prototypes are invaluable tools for visualizing how a logo will appear on the final product. During the printing process, consistently check the first few items for alignment before continuing with the full production run. This step ensures that the setup is correctly calibrated and that all merchandise maintains uniformity in logo placement and spacing. By taking these precautions, you can guarantee that each piece of merchandise accurately represents your brand's identity and professionalism.
Conclusion
Printing logo designs on merchandise requires careful consideration of various factors to ensure the final product reflects your brand's identity accurately and attractively. From selecting the right printing technique and materials to understanding the implications of size, placement, and maintenance, each element plays a crucial role in the success of your branded merchandise. By adhering to these guidelines and continuously striving for quality in every aspect of the printing process, you can enhance your brand's visibility and leave a lasting impression on your audience through well-crafted, professional-looking merchandise.
Let Us Know What You Think!
Every information you read here are written and curated by Kreafolk's team, carefully pieced together with our creative community in mind. Did you enjoy our contents? Leave a comment below and share your thoughts. Cheers to more creative articles and inspirations!





Leave a Comment