How to Create an Effective Instructional Video or Slideshow: A Guide for Experts

In the creative community, sharing knowledge is not just about what you know; it is about how you share your knowledge. Whether you are a designer, artist, or educator, utilizing instructional videos and slideshows are terrific learning formats to teach and inspire, and develop relationships with your learners. Instructional videos and slideshows are great media because they are both visually engaging and can easily present complicated topics in easy incremental steps. To get this started, check out a professional slideshow tool that helps bring your lessons to life. SmartSHOW 3D offers intuitive templates and stunning 3D effects to make your presentations stand out. If you prefer quicker, try Canva's drag-and-drop editor or Adobe Express for advanced features.
The best part of the video and slideshow format is its flexibility. Instructors can create step-by-step tutorials, portfolio walk-throughs, software demos, or design critiques. The bonus is that once recorded, it will work for you around the clock. Each viewer will not only build your credibility, but also in time, your audience!
1. Content Preparation: Start With the End in Mind
Before touching any software, get clear on your objective. What should the viewer learn or be able to do by the end? Write a simple outline. Divide your topic into sections that proceed logically. For instance, if you are teaching color theory for digital artwork, split it into parts: basic principles, examples from actual projects, ideas for combining palettes.
Think in visuals. What images, sketches, or screen recordings will help explain your points? Avoid cramming too much into one video. Focus on clarity and relevance.
2. Choosing the Right Tools
There are tons of programs for making videos and slideshows. Finding one that works for your style and workflow is key.
SmartSHOW 3D: Excellent for more dynamic slideshows that have transitions, 3D effects, and voiceovers. The program contains templates, drag and drop controls, and a ton of visual polish. It is a great option for professionals who want to take their presentation beyond just slideshows.It's an excellent pick for professionals who want their presentations to stand out.
- Pros: User-friendly, polished output, voiceover integration.
- Cons: Windows-only.
Canva: Ideal for simple, stylish presentations. Offers free and paid options. Great for those who want clean designs and collaborative editing.
- Pros: Easy to use, good templates, works in browser.
- Cons: Limited animation, less control over timing and narration.
Adobe Express (formerly Spark): Good for quick slideshows and short videos with text overlays, photos, and icons.
- Pros: Intuitive, connected to Adobe ecosystem.
- Cons: Limited customization compared to Premiere or After Effects.
Other tools you might like:
- PowerPoint – Don’t count it out! It actually has solid animation and narration features, especially for simple presentations.
- Keynote – A smooth, clean option for Mac users.
- Camtasia or Final Cut Pro – If you're getting serious about video editing and want more control, these are great next steps.
3. Creating the Slideshow
Start with a strong opening. Set expectations and grab attention. You can use a striking image, a bold statement, or a preview of what the viewer will learn.
Keep slides basic. Big fonts, minimal words, nice visuals. Add screenshots or very short clips if you're illustrating software or technique. Transitions must enhance, never distract.
Use layering and zoom effects if your software allows you to. This focuses the viewer's eye as well as adding visual interest.
4. Voiceover: Make It Human
A warm, articulate voice can either start or end your slide show. Type out your script, but try reading it first. Make sure that sounds good coming out of your mouth. You don’t need to have an audiobook voice. Enunciate and talk slowly.
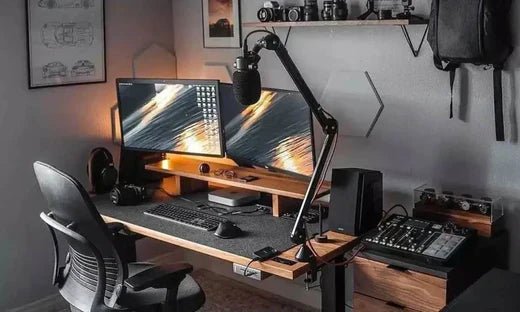
Use a good microphone. Even a mid-range USB mic is far better than a laptop mic. Record in a separate room. Adjust volume levels and take out filler words or awkward pauses, if your program allows.
Record in a separate room. Adjust volume levels and take out filler words or awkward pauses, if your program allows.
5. Final Assembly and Export
Once your visuals and audio are ready, combine everything. Adjust slide timing to match your voiceover. Add background music if it fits the tone — just keep it low so it doesn’t distract.
Preview the whole thing. Look out for typos, awkward pauses, or confusing visuals. Ask a peer to review it too. A second opinion can catch things you missed.
Export in a format that fits your platform. MP4 is the most versatile. Keep resolution high (1080p or better) if you plan to share on YouTube or embed it in a portfolio.
6. Expert Tips: Make It Stick
- Hook them early. The first 10 seconds matter. Start with a question or bold claim to get viewers curious.
- Use story structure. Even in a tutorial, create a sense of progress. Introduce a problem, show the steps, then finish with a result.
- Mix visuals. Alternate between slides, screen captures, and live drawing or design processes. This keeps the pace engaging.
- Be concise. Cut anything that doesn’t add value. Respect your viewer’s time.
- Add subtitles. Many people watch with the sound off. Plus, it boosts accessibility.
Examples of Creative Excellence
Some top-notch examples in the design space include:
- The Futur's YouTube tutorials — clean slides, strong voiceover, professional delivery.
- Adobe Live Sessions — a mix of demo and commentary that shows real-time design thinking.
- Skillshare Classes by Top Creators — carefully structured, visually rich, and highly engaging.
Final Thoughts
It takes work creating an instructional slide show or video, but distributing knowledge that way is one of the most effective and efficient means of distributing. Used correctly, they build trust, teach strongly, and give your students something of lasting worth. Choose equipment that is fitting for your working style, address clarity, and speak from authenticity. Whether distributing your process or teaching students your process, an effective video can take your thoughts and turn them into lasting lessons.


